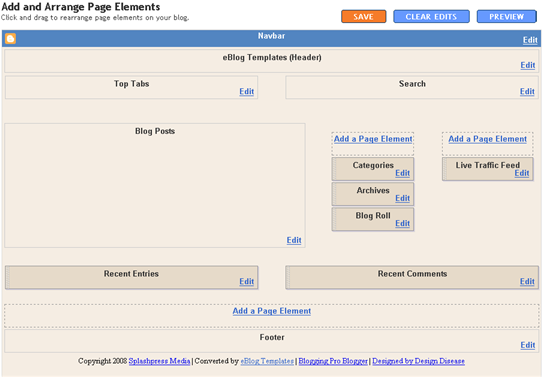
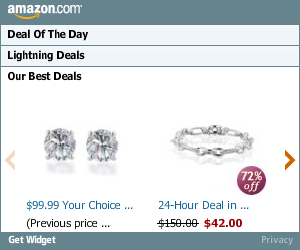
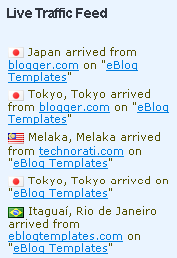
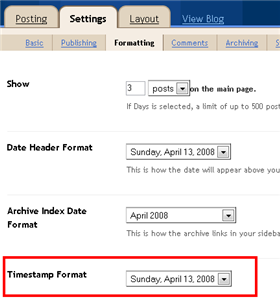
If you’re looking for a great make money online Blogger template then I’ve got news for you. Blogging Pro is the latest and greatest web 2.0 template built just for that. This is another exciting cutting-edge Blogger template that we’re giving away for free and all we ask of you is to keep the footer links intact. You might see some other conversions of this template out there but I promise you’ll find ours to be top-notch and feature-rich. Check out our live Blogging Pro for Blogger demo to see and interact with the template before you even download it! This template was originally designed for WordPress by Design Disease and converted to WordPress by Blogging Pro. We loved this template but were disappointed we couldn’t find a good conversion for Blogger users so guess what? We converted it to Blogger ourselves! It’s a rounded corners, web 2.0, three column, orange and shaded blue beauty with some great features and widgets you’d normally only find with a WordPress theme. Here’s a list of what’s included: You can see from this screenshot that the actual editor is nicely setup so you don’t need to scroll or try and figure out how to click on the “edit” widget links. Most templates that you download make it tough to edit — not this one! Now before you can get fully up and running with this new Blogger template, you’ll need to properly set things up. Please follow the steps below and read items carefully. The same questions are usually asked over and over by people posting comments, yet the answers are usually right in front of them. This is especially true for why the post date might not be working on your blog.Let’s start from the top of the template and work our way down each item. Don’t be too surprised when the template doesn’t look like the screenshot when you first load it up. You’ve got some configuring to do first! This is actually pretty easy since the top tabs are a link list. You don’t need to alter the template code. Just go into your Blogger page layout and click on the “edit” of the “top tabs” widget. Start adding new links and then save. A “home” link will automatically appear once you setup this widget so you won’t need to add one. Save and refresh your blog to see the pretty new tabs you just created. Here’s what it should look like (different names of course) This section is actually setup to dynamically work except for the Feedburner link. You’ll first need to have a FeedBurner account. If you don’t already have one, please read the “How to Setup FeedBurner on Blogger” article and then come back. Once you’ve got your FeedBurner account, you’ll need to edit this template code and replace a few parts. Search your template code for the following text: After you’ve changed this link save your template and check to see if it works. If you’re having trouble finding your feed name or id, please read our article above or see FeedBurner’s help section to locate it. This is a great location for showing ads and we really like how the designer laid everything out. The default ads are just a placeholder but of course feel free to use them until you find a replacement. You’ll need to again edit the template code to swap out the ads. Search your template for Remember, when you paste in your own ads you will need to convert the ad code into a workable Blogger format otherwise you’ll get an error when trying to save it. Use our free AdSense Code Converter to change it automatically for you. You can also look at the existing ad code included in the template and use it as a model. This is a very important step and one that most people think is broken when they install the template. It’s not folks. You just need to go into your Blogger settings and make a small change before it will work. After you install the Blogging Pro template, go to your Blogger’s “Settings” => “Formatting” and look for “Timestamp Format”. Make sure you change it to this format: “Tuesday, January 25,2008? as shown below. This needs to be set in this format otherwise the date won’t show up properly on each of your posts! Actually the date will most likely be blank and you’ll think the template is broken. Remember to change the TIMESTAMP FORMAT (fourth item down on the page) and NOT the Date Header Format option. This is actually a really cool widget put into the sidebar by default. If you have never heard of Amazon’s “Deal of the Day” then you’ve been missing out! Basically each day Amazon has one special item they drastically reduce in price. Before you’d have to visit their site to see the deal but now it gets delivered directly to your Blogger site! If you want to replace or remove this widget you’ll need to edit the code and look for the following text “amazon-widget”. The line of code below that is the actual Amazon widget so just remove or replace it. I really love this part about the template. In the past, your footer was an overlooked piece of real estate on your blog. With this template, it makes good use of your footer like many of the other pro bloggers out there today. This one is easy to setup since we’ve already written an entire article dedicated to this. Please see “How to Setup Recent Comments and Posts Widgets” to configure these two widgets. These two widgets will both appear in the footer once you configure them properly. It’s a very good use of space and provides search engine spiders an entry point into your blog content. This is the other footer element which comes already setup with our recommended money maker links and programs. This idea came from the ProBlogger.net web site and we included it in our template. You are welcome to keep the links intact or feel free to replace them with your own. You will need to edit the template code to swap them out and also have affiliate accounts setup with each vendor. It’s easy if you don’t have any accounts. Just click on each footer link to setup a new account. Search your template code for “Recommended Money Makers” and you’ll see the links below that. This is a really cool feature within this template and the best part is you don’t need to do anything to setup it up! There are some further options if you click on “options >>” on your actual blog page under the widget but that’s it. This is a sample of what it will look like once you start generating some traffic (or more traffic) to your blog. You should now have the template all setup and ready to go. I hope you enjoy this beauty and please make sure to keep the footer links intact since numerous hours of my time and the original designer were put into making it. That’s all we ask for giving away this template! Enjoy! Thanks again to Design Disease and the Blogging Pro guys for making this wonderful template available for free. It was a great challenge converting it to Blogger but it was well worth the trouble. Ready to super charge your blog? Check out our professional premium blogger templates or make money by joining our blog affiliate program! Want to make your blog stand out from the crowd? I recommend giving your newly downloaded Blogger template a unique and personalized look. Read our Free Blogger Header Images article and find yourself a great custom header image!
![]()
Top Tabs Setup
![]()
Configure The Three Header RSS Links
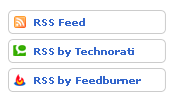
YOUR-FEED-NAME-HERE . Replace the text with your FeedBurner name (i.e. eBlogTemplates is ours)Header AdSense Setup

Individual Post Date Setup

Amazon Deal of the Day Widget
Footer Recent Posts and Comments Widgets

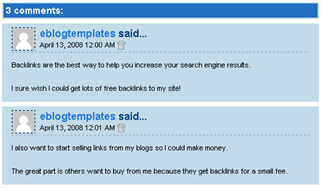
Recommended Money Makers Section
Live Traffic Feed Sidebar Widget
Blogging Pro Template
iTheme Techno
This is another variation of the popular Mac OS interface design which includes the original really cool drag & drop sidebar feature. It allows you to rearrange the order of your sidebar in a dynamic fun way (check out the demo and try it yourself). It also includes the FeedIt widget which shows real-time live traffic to your site. This template also comes with a top AdSense link unit which is a great spot to make money with your blog. Make sure you have a Google AdSense account and then you’ll need to modify the template code and replace the AdSense code with your own. This XML template was converted by BlackQuanta and was designed and built by Nick La. Ready to super charge your blog? Check out our professional premium blogger templates or make money by joining our blog affiliate program! Want to make your blog stand out from the crowd? I recommend giving your newly downloaded Blogger template a unique and personalized look. Read our Free Blogger Header Images article and find yourself a great custom header image!
Installation Instructions
Langit Template
Langit is the latest and coolest “make money” blog template to hit the scene here at eBlog Templates. It’s a very modern, web 2.0, 3 column, black and blue template with a ton of features including some never before used in a Blogger template! We really try to push the limits with our latest and greatest templates and know you’re going to love this one. This template will work right out of the box but in order to personalize it just for you, it’s going to take some work. You’ll need to edit the template code which is usually for more experienced Blogger users but anyone is welcome to try of course. The difficulty level is a 9/10 so be prepared to sit down and spend some time setting this template up. This is the first ever Blogger template that includes a very cool header banner rotator so you can randomly display several different banners in one spot! View the demo and try reloading the page a couple times to see it in action. There are four different banners sharing that spot. Here’s a quick screenshot of how the comments section looks on this template. It’s very unique and not your boring Blogger-style look which makes the Langit template so special. Ok, you’ve got your beverage of choice, a comfortable chair, and are now ready to setup this new template for your blog. We’re going to start from the top and work our way down and I advise you to make backups of your template along the way. Also, always remember to check the “expand widget templates” checkbox in the edit html window of Blogger otherwise you won’t see the entire template code. Let’s begin. The 468 x 60 header banner is a great spot to advertise and you’ll see this spot being used on many websites. The banner spot on this template is an HTML/Javascript widget so you can easily paste in whatever code you want. You actually have several options so choose the one that works best for you. Option 1 - I don’t want to mess with the code now right now and can always come back later. Let’s keep the existing banners. This is also a good choice if you don’t have any banners to use at this time. If you don’t have any banners to use, I recommend signing up for at least one affiliate program like Text Link Ads, or LinkWorth which will give you banners. If you click on the banners in the demo, it will take you to the sites where you can sign-up. Option 2 - I don’t like ads and want to remove it. Sure, just delete the widget from your blog. Option 3 - I only have one banner and don’t want to use the banner rotator script. Ok, no problem. Just edit the banner widget and paste in your single banner code. It will automatically remove the banner rotator and replace it with your new banner. Option 4 - I’ve got plenty of time and a few banners and want to set this thing up now. Perfect! In order for you to get your banners to work properly, you’ll need to run the javascript banner rotator script (you’ll need to have your banner images hosted somewhere before using the banner rotator script otherwise it won’t work) to give you the proper code and then just paste it into the banner widget box within your layout page. This will automatically remove the default banner rotator and replace it with your new banners. Before moving forward, I recommend you first read our article on the basics of setting up FeedBurner for Blogger if you don’t already have an account. After you get your account up and running, you’ll need to edit the template code to update the FeedBurner section. First, search your template code for id=”top_rblock” which is where you’ll find the FeedBurner code. Next, replace the “YOUR-FEED-NAME-HERE”, “YOUR-FEED-ID-HERE”, and “YOUR-BLOG-NAME-HERE” text with your FeedBurner provided info. You’ll also need to activate the email subscription feature within FeedBurner. (read the bottom part of the article describing where you get the code). There are a total of 4 places you need to update so make sure you got them all. You’ll also want to add your own feed counter which shows the total number of subscribers you have. You’ll need to activate this first under “Publicize” –> “FeedCount” and then scroll down to click on “Activate”. Now you can change the colors and copy the code to use in your Blogger template. You’ll want to replace the following code in your template: Now your feed count will automatically update whenever someone subscribes to your blog! This is pretty easy actually since the top tabs are generated via a link list. Just go into your Blogger layout page and click “edit” on the “top tabs” widget. There you can add as many tabs as you want. The “home” tab automatically appears so you don’t need to create one. You’ll need to have the following 3rd party accounts setup if you want to make money and use this template as designed. The ads currently in this template are placeholders and will continue to work if you’d rather not hassle with setting up new accounts or changing the code so it’s up to you. After you’ve got your advertising accounts all setup, you can move on and configure the ad sections in this template. You’ll first need to be familiar with Google AdSense and how to setup a new ad before changing this code. Make sure to use the matching colors which will not only make it blend in with your blog but will also increase clicks. The color scheme is as follows: border & background: 44494D, text & url: FFFFFF, and title: D7DFF0. Once you’ve got your new 336 x 280 AdSense block of code, you’ll need to convert it using our Ad Code Converter. Take the output of that and then replace the existing code in the template. To find the code in the template, search for “adsense code start”. This is the ad unit you’ll find right below each blog post. It’s called “Related Products” and is a great way to make money from your blog. Each time someone clicks on your link, you get paid! It’s a PPC program (pay per click) just like Google AdSense but it’s run by Chitika. Check out the template demo and see for yourself. Try clicking on any of the links and see where it takes you. Much different than Google AdSense. So after you’ve setup your account, you’ll need to create a new 468 x 90 Related Product Unit (RPU). You can generate the code by clicking on the “Get Code” tab within Chitika. Then it will walk you through creating an ad unit. You can even change the colors which we did on our ad unit (title: 2277DD) so it matches our site better. Next, grab the code and then you’ll need to convert it using our Ad Code Converter. Take the output of that and then replace the existing code in the template. To find the code in the template, search for “chitika code start”. Chances are when you first install this template your timestamp format won’t be set properly and you’ll see an “undefined” message instead of the post date. You’ll need to make one small change in your “Settings” => “Formatting” => “Timestamp Format” section before it will work. Change whatever you currently have to this format: “Sunday, April 13, 2008″ and then save. Make sure you change the “Timestamp Format” which is the 4th one down. Your template should now work properly. Ok, that pretty much covers everything you need to properly setup this template. Oh, one more thing. On some blogs, the header blog name title is too wide and ends up wrapping which doesn’t look so good. You can easily change that by going into your Blogger “Fonts & Colors” section and making your title size smaller. Another option is to just shorten your blog name but I don’t think you want to do that. This template was originally designed for WordPress by Eches and converted to Blogger by GosuBlogger. eBlog Templates saw a lot more potential with the nice template and decided to take GosuBlogger’s initial conversion to the next level by optimizing and adding several new features to help you make more money with your site. 4/13/08 - Fixed json entry.title.$t javascript error so the template now validates correctly in both IE and FF. Ready to super charge your blog? Check out our professional premium blogger templates or make money by joining our blog affiliate program! Want to make your blog stand out from the crowd? I recommend giving your newly downloaded Blogger template a unique and personalized look. Read our Free Blogger Header Images article and find yourself a great custom header image!
Features Include:
Let’s Configure this Template!
Step #1 - Setup Your Header Banner
![]()
Step #2 - Setup Your RSS Feed Using FeedBurner
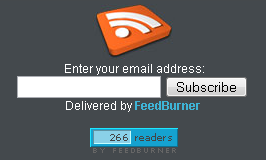
http://i254.photobucket.com/albums/hh92/eblogtemplates/langit/feed-counter.gif
with something that looks like this:http://feeds.feedburner.com/~fc/myfeed?bg=99CCFF&fg=444444&anim=1Step #3 - Add Top Tabs
![]()
Step #4 - Setup Advertising Accounts

![]()
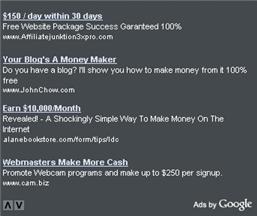
Step #5 - Configure AdSense Sidebar 336 x 280 Ad Unit
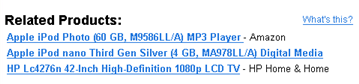
Step #6 - Configure Chitika 468 x 90 Ad Unit
Step #7 - Get Your Individual Post Date Stamp Working
Credits
Revision History
4/14/08 - Fixed another javascript error only affected in IE. It was the FeedBurner form action url. Also made the subscribe box a small pop-up window instead of a new browser page.
Ads Theme Template
If you’re looking for a new Blogger template, you came at the right time. Hands down, this is the best template we’ve converted here at eBlog Templates. It’s a wonderful web 2.0 popular blog layout with some great built in ad spots (hence the template name) and features. It’s either a two or 3 column template (you can change it on the fly) so you get the best of both worlds. This Blogger template is what I call a “powerhouse” template since almost all the features you need are already built in. On top of that, it’s quite easy to setup and makes your blog look like a professional site without much effort. I predict this template will be a top template on this site within a few months, if not weeks. With the amount of effort that went into converting this template and attention to details, I sure hope you appreciate this free amazing new xml Blogger/Blogspot template.
Features Include
Refresh Template
If the colors of Digg suit your fancy, then I’ve got a new Blogger template for you. It’s called Refresh which is a subtle two column template with some nice features. First off, you get the dynamic header tabs built in so just edit the “top tabs” widget and your tabs will appear. The original actually used labels for your top tabs but if you’ve got too many, it breaks the nav. The sidebar has an html widget so you can enter some information about your site. Below that comes your standard labels/categories widget, and archives widget. Make sure to set your archives widget to “flat” display otherwise it might look funny. This template was designed by Styleshout and converted into xml Blogger by Tech Bold. eBlog Templates enhanced it and moved the images over to our hosting environment. Ready to super charge your blog? Check out our professional premium blogger templates or make money by joining our blog affiliate program! Want to make your blog stand out from the crowd? I recommend giving your newly downloaded Blogger template a unique and personalized look. Read our Free Blogger Header Images article and find yourself a great custom header image!
SFDC Blogger Template
Here’s a nice simple 2 column web 2.0 template with header tabs and sidebar modules. It also includes a custom rss sidebar button, recent posts and comments widgets, search box, and a link widget. All images are hosted using our Photobucket Pro account so just download this Blogspot template and get to work. The original design was created by salesforce.com and converted into this nice new xml Blogger template by eBlog Templates. Update 3/20/08 - Fixed the individual posts date/time. Before it was showing duplicate entries. Also added in author. See demo for example. Ready to super charge your blog? Check out our professional premium blogger templates or make money by joining our blog affiliate program! Want to make your blog stand out from the crowd? I recommend giving your newly downloaded Blogger template a unique and personalized look. Read our Free Blogger Header Images article and find yourself a great custom header image!
Revision History
Update 3/24/08 - Added missing AdSense Blogger code for individual posts. Now you can properly insert AdSense in between your Blogger posts.
iTheme Template
This beautiful Apple OS knock off new Blogger template is awesome. Not only does it look and feel just like you’re using a Mac, but it’s quite functional as well. It includes the original really cool drag & drop sidebar feature which allows you to rearrange the order of your sidebar in a dynamic fun way (check out the demo and try it yourself). It also includes the FeedIt widget which shows real-time live traffic to your site. This template also comes with a top AdSense link unit which is a great spot to make money with your blog. Make sure you have a Google AdSense account and then you’ll need to modify the template code and replace the AdSense code with your own. So if you’ve got the iPhone, iTouch, iPod, iMac, and all the other amazing Apple products, this template has your name all over it. Now you can have your own iBlog template! I love the silver and white modules with the icons and the tabs. Speaking of tabs, if you want to add some you’ll need to edit the “top tabs” page element within Blogger. It’s easy to do though since it’s a link list. That means you don’t need to go muck around in the template code to add/remove new tabs. A cool feature added by eBlog Templates. The date box on each post is a bonus feature as well. If the date doesn’t show up when you first install it, you’ll have to make a small change in your Blogger settings. Go to “Settings” => “Formatting” => “Timestamp Format” and change it to this format: Saturday, February 09, 2008. That should make the date feature work. Another additional widget included in this Apple iTheme template is the “recent posts” widget. You’ll need to plug in your rss feed to get it to work though. Just copy the entire rss feed url and paste it in the widget. The original design was done by N.Design Studio and ported over to Blogger by BlackQuanta. Update (3/3/08) - Blogger recently made a change to their xml parser which caused this template to break (no div tags in the head error message). It has since been fixed so please download it again if you don’t have a working version. Ready to super charge your blog? Check out our professional premium blogger templates or make money by joining our blog affiliate program! Want to make your blog stand out from the crowd? I recommend giving your newly downloaded Blogger template a unique and personalized look. Read our Free Blogger Header Images article and find yourself a great custom header image!
Red Stamp Template
Please welcome the latest Blogger template to our library. eBlog Templates was first to convert this classy web 2.0 styled Red Stamp template. It’s actually better than the original WordPress version since we’ve added in additional features like: We’ve made this template as easy as possible for you to edit and even change the colors via Blogger’s built in “Fonts & Colors” tool. You don’t need to edit the template code at all (some people are afraid they’ll mess something up if they do) so all the configuration resides within Blogger’s native interface which you’re used to! Here are the configurations you need to make to get this working properly. First off the header tabs won’t appear when you first install this. You need to go into “Template” => “Page Elements” and then edit the “Top Tabs” widget. Here you can add all the tabs you want which will automatically appear once you save it. No need to add a “Home” tab since it will magically appear once you add just one new tab. You’ll see what I’m talking about once you start playing around with it. Working your way down the page elements you’ll next come across a widget called “you can change this text he…”. This is the neat red box you see below. Just edit this and change the title as well as enter any text you want in the box. The default text will vanish once you save it. The other cool widgets you need to configure are easy as well. The “Recent Posts” and “Recent Comments” widgets are very simple. Read this post on how to easily set them up. The Ads widget is just an html text box so you can put any sort of banner ad code in there. The default Text Link Ads button will automatically disappear once you do this. You can also of course remove the Ads widget altogether if you don’t want it. You don’t need to configure the RSS Feed icon. We’ve set it up to work automatically for you! Thanks to the folks over at AskGraphics for designing this template for WordPress. We love converting cool themes like this one so Blogger and Blogspot users can pimp their blogs too. Ready to super charge your blog? Check out our professional premium blogger templates or make money by joining our blog affiliate program! Want to make your blog stand out from the crowd? I recommend giving your newly downloaded Blogger template a unique and personalized look. Read our Free Blogger Header Images article and find yourself a great custom header image!

iWork Template
This fabulous, futuristic, and web 2.0 Blogger template is full of style and features. It’s an ideal template for someone who loves Apple’s look and or gadgets. Of course, if that it not your personality you can still download the template and use it however you like. Some of the cool widgets this template includes are: Everything works straight out of the box so no template code editing. You do have to configure some of these widgets before they will show up on your blog. To setup the recent posts and recent comments widgets please read “How to setup your recent posts/comments” article. For the header tabs to appear, you need to edit that widget (it’s just a link list) within the Blogger page element screen. Just start adding new tabs and you’ll see them magically appear. No need to add a “Home” tab because it’s built into the default template. All the widgets are movable (even the search box and rss feed) so you can reposition them to your heart’s content. All images are hosted on our dedicated Pro photobucket account so you don’ t need to worry about broken images or hosting them yourself. If you’re more comfortable moving the images to your own server then go for it. I actually would just to know I’m in control of my images. This template was designed by Nicola Di Trento (who for some reason is difficult to track down) for WordPress originally. Jacky or myself couldn’t find a link to his site to give him proper credit. iWork was converted into the new Blogger xml template by Jacky Supit and enhanced by eBlog Templates. 4/16/08 - Created live demo site, Blogger AdSense code now works in between posts, added adstart & adend tags, added Feedjit widget, moved header title up. Ready to super charge your blog? Check out our professional premium blogger templates or make money by joining our blog affiliate program! Want to make your blog stand out from the crowd? I recommend giving your newly downloaded Blogger template a unique and personalized look. Read our Free Blogger Header Images article and find yourself a great custom header image!
Revision History
Blog Oh Blog V2.0 Template
Blog Oh Blog v2.0 is a very clean and useful new Blogger template. It’s been enhanced by eBlog Templates so it’s more functional and easier for you to setup! It comes with 3 columns and the following widgets. Recent Posts, Recent Comments, Search, RSS Feed, Link List, and tabbed navigation. It’s easy to update the tabs once you install the template. Actually you won’t see any tabs when you first set it up. You’ll need to go into template edit mode and edit the “Top Tabs” page element. There you can create all the tabs you want. The “Home” tab gets automatically created after you setup your first tab. There’s also a header Ad html box which you can either remove or update with your own banner ad. It’s a perfect spot for a 468×60 banner such as Google adsense, etc. Once you edit the page element, the default Text Link Ads banner ad will go away. The about box in the top right area is easy to edit as well. Just enter whatever text you want in the widget box. Also, you’ll need to setup the Recent Posts and Comments widgets. Read this post for instructions on how to configure them. Thanks to Blog Oh Blog for designing this template (originally for WordPress) and to Jacky Supid for converting it to the new xml Blogger template. Update 5/11/08 - Added Feedjit sidebar widget & fixed layout editor page so widgets align properly. Also added live demo site. Ready to super charge your blog? Check out our professional premium blogger templates or make money by joining our blog affiliate program! Want to make your blog stand out from the crowd? I recommend giving your newly downloaded Blogger template a unique and personalized look. Read our Free Blogger Header Images article and find yourself a great custom header image!
Revision History
Missing Piece Template
If puzzles or games are your thing, then this is a great template for you. It’s a rounded web 2.0-style xml Blogger template with cool puzzle modules. It’s a two column green, red, and black colored template with a footer widget just for your ads (or whatever you want). You’ll need to make some changes before this template will be setup for you. To change the top tabs, you need to edit the template code and search for this code: Here you can add or remove any tabs you want. Make sure to keep the “Home” link intact. You’ll also need to make sure the Timestamp Format is set to “Saturday, February 02, 2008″ otherwise the date won’t properly appear on your posts. It’s under the “Settings” => “Formatting” section of your Blogger dashboard. This template was originally created by Free CSS Templates and converted into Blogger by Steven Kroll. Some modifications were made by eBlog Templates to make it enhanced. The credit links need to be kept in order for you to use this template. Thanks! Ready to super charge your blog? Check out our professional premium blogger templates or make money by joining our blog affiliate program! Want to make your blog stand out from the crowd? I recommend giving your newly downloaded Blogger template a unique and personalized look. Read our Free Blogger Header Images article and find yourself a great custom header image!
Advertising Template
This simple blue template is perfect for any type of site. It’s a fixed width center template with a left sidebar. the sidebar contains page elements like “recent posts”, “recent comments”, and more. There’s no header image and just a blue background so call it whatever you like. To make the recent posts and recent comments work, just edit those page elements and paste in your rss feeds which will look like this: Original design by freecsstemplates.com and converted to a Blogger template by eBlog Templates. Ready to super charge your blog? Check out our professional premium blogger templates or make money by joining our blog affiliate program! Want to make your blog stand out from the crowd? I recommend giving your newly downloaded Blogger template a unique and personalized look. Read our Free Blogger Header Images article and find yourself a great custom header image!
Daya Earth Template
This rounded style template with a nice header image of earth from space is called Daya Earth. It’s originally based off the Rounders Blogger template but evolved into this earth version. It’s got 3 columns so plenty of room to put your page elements or advertisements. Original design by Abdul Munir but the modified header was done by yours truly. Update 5/2/08 - Created demo site and added new sidebar widgets. Ready to super charge your blog? Check out our professional premium blogger templates or make money by joining our blog affiliate program! Want to make your blog stand out from the crowd? I recommend giving your newly downloaded Blogger template a unique and personalized look. Read our Free Blogger Header Images article and find yourself a great custom header image!
Revision History
WP-Polaroid Blogger Template
I’m very pleased to announce the release of WP-Polaroid for Blogger! This template is full of cool features and took me a long time to convert from the original WordPress theme (by Adii) so I hope you appreciate it. This template is very popular with WordPress users and for good reason. It’s stylish, nicely laid out, and very web 2.0. Not only that, it’s also got the following sidebar page elements built in. You just need to configure them (follow the directions below) in order for them to work properly. Make sure to read through all the steps below in order for the template to function on your blog properly. I tried to make it as simple for you as possible by using the Page Elements instead of embedded code but if you have any questions, please post them below. I usually get back to everyone within 24 hours so please be patient! Also, please be aware that in order to correctly setup this template you’ll need to be comfortable with editing the template code as well as some experience with photo editing software (see step #9). I’d hate for you to spend a bunch of time trying to get this template working only to hit a road block towards the end. Now I’m going to be honest with you before we begin. When you use this template you’ll most likely have to wipe out all your existing page elements and start from scratch. Not only is this easiest but it also gives you a clean slate. Now this isn’t always the case but I just wanted to warn you upfront. You might even want to setup a new blog within Blogger to test this template out before you really start using it. It’s easy to do — just go to your Blogger dashboard (top right corner link) and “create new blog”. Think of it as a testing area before clobbering your existing blog. Another option is to try and backup your existing page elements which is explained in my “How to Install a Blogger XML Template” article. Disclaimer: I am not responsible if you mess up your Blogger site. This template and set of instructions is free but does not come with any sort of warranty. I’m sure you already realize this but I just wanted to cover my butt regardless. (this is the fine print) The following 10 steps assume you’ve installed the new WP-Polaroid Blogger template and are now ready to configure the page elements. If you had trouble installing the template, try applying it a second time and saving. Blogger is buggy and that’s actually what I had to do when setting up a demo blog for this writeup (Update - you might want to start with step #10 and then come back to step #1 since it involves editing the actual template code before setting up the page elements). You can also download the original Photoshop .psd from Adii’s site if you’d like to modify the images. He also provides some steps on setting up the template but for WordPress only. Open your blog site in a new browser window so you can see how it currently looks. I’ve put some placeholder text in some areas (which we’ll replace in the steps below) to give you an idea as to how it’s supposed to look. Now in a separate browser window, head on over to “Template” =>”Page Elements” and we’ll start setting up your new Blogger template. First we’re going to customize the header and we’ll start with the Header-Text-Box-Left page element which you can see marked with a red square in the image. Now when you edit the page element you’ll see “Header-Text-Box-Left” as the title which you can change to something like “MORE ABOUT ME…”. Then add whatever text you want in the text box which will end up appearing below the title (like the white text in the image). Ok, save your page element and you’re done with this box. Do the same with the “Header-Text-Box-Right” page element and you’ll be finished with the header text boxes. Save and then refresh your other Blogger browser window to see what it looks like. We’ll take care of the header links and center puppy image later on since it requires editing of the template code. Let’s move on. These lists aren’t going to show up when you first installed the template so we’re going to bring them to life now. They are actually both RSS Feed widgets so we’ll need to paste in your feed and comment rss feeds to make them work. Let’s start with the Recent Posts page element so click edit it. Then paste in your RSS feed url which will most likely be in this format http://YOURSITE.blogspot.com/feeds/posts/default . Make sure to replace “YOURSITE” with your actual blog url. There’s no need to change the title (unless you want to call it something else) so then hit “Save Changes”. Then save your blogger layout and go over to your other browser window, refresh and see the Recent Posts appear in your blog’s sidebar. Pretty cool huh! Now you’re going to do the exact same thing with the “Recent Comments” page element but you’ll instead use this feed format http://YOURSITE.blogspot.com/feeds/comments/default . Again, make sure to replace “YOURSITE” with your actual blog url. Save and make sure it’s working properly. If it doesn’t appear on your blog, chances are you don’t have the correct feed url or you might not have any comments yet. These two page elements are basically link lists where you can links to any sites. Did you know that you can actually sell links from your blog? It’s a very popular and growing business on the web since the number and quality of links to ones’ site increases their rankings in Google and Yahoo. If you want to learn more about selling links on your blog, check out Text Link Ads for more information. I use them and they do a 50/50 revenue split which is great since they handle the advertising & transactions. Anyhow, to setup the link page elements, click on edit of the My Sponsors page element and then enter the names and urls of the sites you wish to link to. Feel free to add a link to my site so other’s know where you got this wonderful template! Now do the same for the Link Love page element to get additional links added. If having both link page elements is too much, feel free to delete one from your page layout. This page element should have been working from the moment you installed this template. The only problem is it probably didn’t look right because the page element style needed to be set to “Flat List” so let’s do that now (if your blog archive list is already set to flat, then you can skip this step). Edit the page element and change the default of “Hierarchy” to “Flat List”. You’ll see it change in the preview window so you’ll know it worked. Click “Save Changes” and then save the page layout. Now view your blog which you have open in a separate browser window to see how it looks now. It should be correct. Now this is one of the unique and cool features about this template. It’s integrated with MyBlogLog which is a cool tool for showing pictures of visitors to your site. If you don’t already have an account, you need to set one up first before completing this step. Once you’ve setup an account, claimed your blog, then you can create a widget. I’m going to assume you’ve done those steps and are now ready to plug in your widget. You should be on this screen now within mybloglog.com. We’re going to make this very easy so don’t worry about any of the colors, width, etc and just click the “Preview and Get Code” button. I know this sounds strange but just stick with me here. So the next screen you’ll get a page with the blocks of code you can use. It will look like this: The only piece of that code that we need is the part I’ve marked in red. This is the mblID code which is the unique id just for your blog. you’re going to copy this entire id code (I covered some of the digits in the screenshot on purpose) which should be 16 numbers, and put it somewhere safe (like open notepad and paste it there for now). Then take this javascript code above and replace the “PUTYOURCODEHERE” with the 16 digit number you just put somewhere safe. Next, you’re going to edit the “Recent Readers” page element and paste this new code into the text box. It will look like the image below but it won’t wrap (I just did it for illustration purposes). Click “Save Changes” and go preview it in your blog. This will replace the current set of mybloglog pictures you see on your site with your set of visitors. Now don’t get too excited because there’s a good chance this section will be empty for a while (almost for sure if you just signed up for a mybloglog account) since you haven’t had any visitors yet so don’t worry. Give it a few weeks before you’ll see some pictures appear. I don’t know about most of you but I like to try and monetize my blogs. It’s a great passive income stream and fun to see how much you can make. Don’t expect a lot to pour in but at least get some ads on your site to make a few bucks. If you haven’t already read my “How to Make Money From Your Blog - Tip #1” article about setting up Google AdSense on your blog, I’d advice you to read it. You can create 125×125 ads within Google and place them in these spots, for example. Now let’s go edit the page element. You need to have three 125×125 ads ready to pop into this spot otherwise it’s not going to work. The images also need to be hosted somewhere so make sure you’ve got everything ready before moving forward. Here’s an example of what your code will look like: This is the actual code currently being used in your blog template. It’s placeholder code but important to keep so continue reading to understand why. It’s very important you keep the formatting of this section intact otherwise they won’t appear properly. I’m mainly speaking about the If you don’t have any ads to use yet, feel free to keep the placeholder ads there. I recommend clicking on the three ads and setting up accounts with them so you can make money with your blog. If you don’t want the ads you can just delete this page element from your page layout. Yes, you’re probably wondering why there’s a picture of a cute puppy on your blog. The good news is I actually put it there as a placeholder so it’s easier for you swap out and add your own image. The bad news is you’ll need to have some photo editing skills in order to get the image setup correctly. So first let me tell you how to change the image and then second, explain how to add your own instead. The puppy image code is in the .css part which looks like this: This is where you’ll need to put the link to your new image. If you don’t want an image at all (or at least for the time being) then just delete the url and the default black polaroid picture will appear. The puppy picture is just positioned on top of the default black picture. So before you can add a new photo, you’ll need to properly size Due to popular demand, I’ve made the polaroid header image straight so it’s easy to add your personal photo without having to rotate it. It’s included in the latest version so just download and you’ve got it. This sets up the photo to the right size to fit back on top of the polaroid background. Next, save the image you just modified (You can save the photo in any of the standard image formats like png, gif, jpeg, etc) and upload it to a place online where you can link to it. There are free image hosting services like Photobucket, Googlepages, or ImageShack just to name a few. I personally use Photobucket but any of those will do. You’ll need to setup a free account and then you can upload your images. After you’ve uploaded your new image, you need to get the url where the image is now located. If you decided to use Photobucket, your new url will look something like this: Take that url and replace the puppy.png url I showed you above. Save your template and reload your blog. Your new picture should now be on your home page! If not, then double-check and make sure you correctly uploaded the photo and it works. If you see your photo on your home page but it’s just not aligned properly, then you’ll need to go back to your photo editing program and tweak it some more. Another option is to edit the .css file and search for UPDATE: If you also want to remove the “Polaroid of Me” text across the default polaroid picture you can. You’ll need to edit the template code and replace the existing polaroid image on line 219 with this one. Search for “rotator.png” then replace it with “blank-polaroid.png” and you should be good to go. (Thanks to Lindsay in the comments below for the suggestion!). The latest download version now comes without the text on the polaroid picture. This will make your new links aligned neatly instead of being squished to the left. You can style them even further (color, size, etc) but you’ll have to do that on your own. Update 4/22/08 - Several people requested to have real 125 x 125 ads instead of the blank placeholder ones so this has been done. A new screen shot shows how this looks as well as the live demo. You can swap out the ads or keep them there indefinitely if you don’t have any ads to use. Update 5/17/08 - Fixed the individual post image right align issue. You can easily fix this yourself if you’re using this template prior to 5/17. Search your template code for “.postmetadata” and then change the padding element of “15px” to “20px”. That will push everything down and align the images correctly. Thanks to Ricardo for his help on this. Ready to super charge your blog? Check out our professional premium blogger templates or make money by joining our blog affiliate program! Want to make your blog stand out from the crowd? I recommend giving your newly downloaded Blogger template a unique and personalized look. Read our Free Blogger Header Images article and find yourself a great custom header image!
Step #8 - Configure the Three 125×125 Ad Spots![]()
WP-Polaroid Blogger Installation
Step #1 - Configure the Header Page Elements
Step #2 - Setup Recent Posts and Recent Comments Page Elements

Step #3 - Setup My Sponsors and Link Love Page Elements
Step #4 - Configure the Blog Archive Page Element
Step #5 - Configure the Recent Readers Page Element

class='last' tag at the end of the third 125×125 ad. If that isn’t included in your code, it will look funny on your site. This is a hard step so hopefully you got this far.Step #9 - Change the Puppy Header Image
/*=== Change this header puppy picture to one of yours ===*/
#polaroids-pic{
background: url(http://i254.photobucket.com/albums/hh92/eblogtemplates/polaroid/puppy.png) no-repeat;
and rotate it. So open your picture in any photo editor like MS Paint, Adobe Photoshop, Paint.net (free download), GIMP (free download), or Picasa. If you don’t have software already installed, you can always use one of the free online photo editing sites instead like Picnik, Phixr, or FotoFlexer. Whichever photo editing software you decide to use, get ready to make the following two changes.Rotate the photo 4 degrees counter clockwiseUpdate (2/1/08)
http://i254.photobucket.com/albums/hh92/yourname/newfolder/yourpicture.png #polaroids-pic { . There you can the position, height, width, etc for fine tuning. You really shouldn’t need to mess with those settings though.
Enlight Template
Here’s another beautiful web 2.0 Blogger template. It’s fluid width which means when you maximize your browser window, it stretches the entire screen. Besides your standard right side page element area, this template has header links as well. You’ll need to edit the .xml template code to change them though which is easy to do. In the header are three icons for your homepage, contact, and sitemap which you’ll also need to update the links to. Enjoy this beauty complements of Francisco who converted it to Blogger and FreeCSSTemplate.org for the design work! Ready to super charge your blog? Check out our professional premium blogger templates or make money by joining our blog affiliate program! Want to make your blog stand out from the crowd? I recommend giving your newly downloaded Blogger template a unique and personalized look. Read our Free Blogger Header Images article and find yourself a great custom header image!
Curved Template
If you like the new rounded web 2.0 look, you’ll love this template. The aqua blue tabs and frame complement the black striped header background and white post and right column area. This Blogger template was originally in Spanish but I translated it for you. Don’t worry, it wasn’t too much work since only a few things needed to be changed. There’s a nice search box to go along with this template which works right out of the box. In order to change the tabs you need to edit the template code. Don’t be afraid though if you’ve never touched html code before. Just open the .xml file in a text editor like notepad.exe or wordpad.exe (or you can even edit it directly in the Blogger code window) and search for the following area: Now just swap out the “#” for a real link and change the tab and title names. Easy as pie. Then save the template and copy the code back into the Blogger editor window. This template was designed by Just Skins and ported over to Blogger by Francisco. Ready to super charge your blog? Check out our professional premium blogger templates or make money by joining our blog affiliate program! Want to make your blog stand out from the crowd? I recommend giving your newly downloaded Blogger template a unique and personalized look. Read our Free Blogger Header Images article and find yourself a great custom header image!
Styleicious Template
Styleicious is a cool web 2.0 style Blogger template with tabs across the top right. The header is a soft aqua blue and the body contains 2 or 3 column, a nice footer where you can put your post archives, and a search box to boot. To change the tab urls and names you need to edit the template code. Open the .xml file in a text editor and then search for this: Now you can change the hrefs and tab names to whatever you like. All images are pre-hosted on our photobucket.com pro account which has unlimited bandwidth. That means you don’t need to worry about the images not showing up which can happen to other Blogger xml templates. This theme was originally designed by Tom over at thaslayer.com and converted into this Blogger template by Francisco from Blog and Web. Ready to super charge your blog? Check out our professional premium blogger templates or make money by joining our blog affiliate program! Want to make your blog stand out from the crowd? I recommend giving your newly downloaded Blogger template a unique and personalized look. Read our Free Blogger Header Images article and find yourself a great custom header image!
The Globe Template
This tan colored template starts off with a globe image in the header and has rounded modules throughout the body. It’s a web 2.0 looking Blogger template and easy to change the header image and colors within the code. There is also a subscribe feed module that you need to update if you want it to work properly. I would recommend that you delete the feed urls that you don’t have setup yet or just setup an Feedburner account instead. This “How to Setup Feedburner on Blogger” post will explain how to get one easily setup. This template is based off the original “Rounders4″ template by Douglas Bowman and was modified and renamed to “The Globe” by Template Panic. Ready to super charge your blog? Check out our professional premium blogger templates or make money by joining our blog affiliate program! Want to make your blog stand out from the crowd? I recommend giving your newly downloaded Blogger template a unique and personalized look. Read our Free Blogger Header Images article and find yourself a great custom header image!
sIMPRESS Template
I’m excited to announce that sIMPRESS 2.0 for Blogger is now available. This is a nice web 2.0 Blogger template with several cool features. First off, it’s got tabs across the top so you can customize and add new ones as you please. Next, it’s a fluid width template which means it stretches when you expand your browser. It also has a cool date function that shows the day and month for each post. It’s using a javascript formatting function to handle this which you don’t need to worry about. There is also a search box built in but you’ll have to wire it up for it to work properly. There’s a couple of simple configuration settings you need to make in order for this template to work properly. In order to get the date to display correctly, you need to go into your “Settings” => “Formatting” area and change the timestamp format to this format “Sunday, January 20, 2008″. See the image for details. Next, to setup your tabs across the top, you need to edit the template code. Look for this block of code and change the links and names of each tab as you like. All images are pre-hosted and the javascript is built into the template so the date on each post feature works very well! We distribute template unlike other sites which break after a few months because the owner moved the images or javascript file. We host the images on an unlimited bandwidth server so you don’t have to worry about broken images! Thanks to Dezinerfolio for designing the template and Blog and Web for converting it into an xml Blogger template. Ready to super charge your blog? Check out our professional premium blogger templates or make money by joining our blog affiliate program! Want to make your blog stand out from the crowd? I recommend giving your newly downloaded Blogger template a unique and personalized look. Read our Free Blogger Header Images article and find yourself a great custom header image!
Installation
Blogy Web 2.0 Template
Blogy is a great and functional Web 2.0 Blogger template. It’s got two right sidebars so you can easily add Google Adsense or another advertisement block. It also has a cool mouse over tab function which is pretty uncommon for Blogger templates. You’ll need to go into the template code and edit a few areas though. It’s the right side above both the sidebars which is easy to change. All images are hosted so just download the template and install! Also, in order to get the date for each post formatted correctly you need to make the following change (if you don’t already have it set this way). Your date on each post should now display correctly. If you have any questions or comments, please leave them below! Ready to super charge your blog? Check out our professional premium blogger templates or make money by joining our blog affiliate program! Want to make your blog stand out from the crowd? I recommend giving your newly downloaded Blogger template a unique and personalized look. Read our Free Blogger Header Images article and find yourself a great custom header image!

